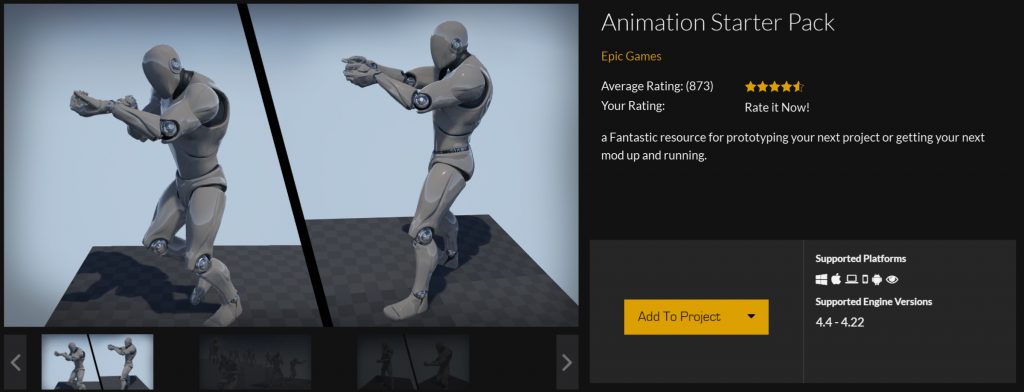
While developing a prototype for a new game I am working on right now, I decided to use free assets as much as possible. For animations I found Animation Starter Pack by Epic Games very useful. You probably don’t want to use it in your actual game – but it’s really good for answering a lot of questions about your gameplay. And it is a perfect placeholder for future production-quality animations.
I just finished another iteration of my project where paid a lot of attention to polishing the main character animations. This is how it looks so far:
Most likely I won’t touch it anymore. It seems I squeezed the maximum out of this pack. My plan is to hire a professional animator (or an animation specialist?) to produce movie-like stylized animations.
But let’s see, what you can do with this Animation Pack. The article is going to be a tutorial where I create a new Unreal Engine project and make something similar to what you saw in the gif above. Alright, let’s dive in.
Animation Starter Pack
Let’s start with the prerequisites. I am not going to thoroughly describe these steps – I hope you already are good enough in UE4 to do that 😉
- Create a new project. Choose third person shooter as a template. Select Blueprint version – we won’t need C++ in this tutorial
- Add Animation Starter Pack to the project
- Switch the main character from the default one to the one from the Pack (it’s called Ue4_ASP_Character)
Another thing you will do on your own is an aimoffset blueprint. Please follow the tutorial from Epics: https://docs.unrealengine.com/en-US/Engine/Animation/AnimHowTo/AimOffset. It’s pretty good (better than mine :)). One thing to note – when you are about to create an AimOffset blueprint call it AO_TPSGun. This way you won’t be confused when you see this name on my screenshots.
Walking Animation
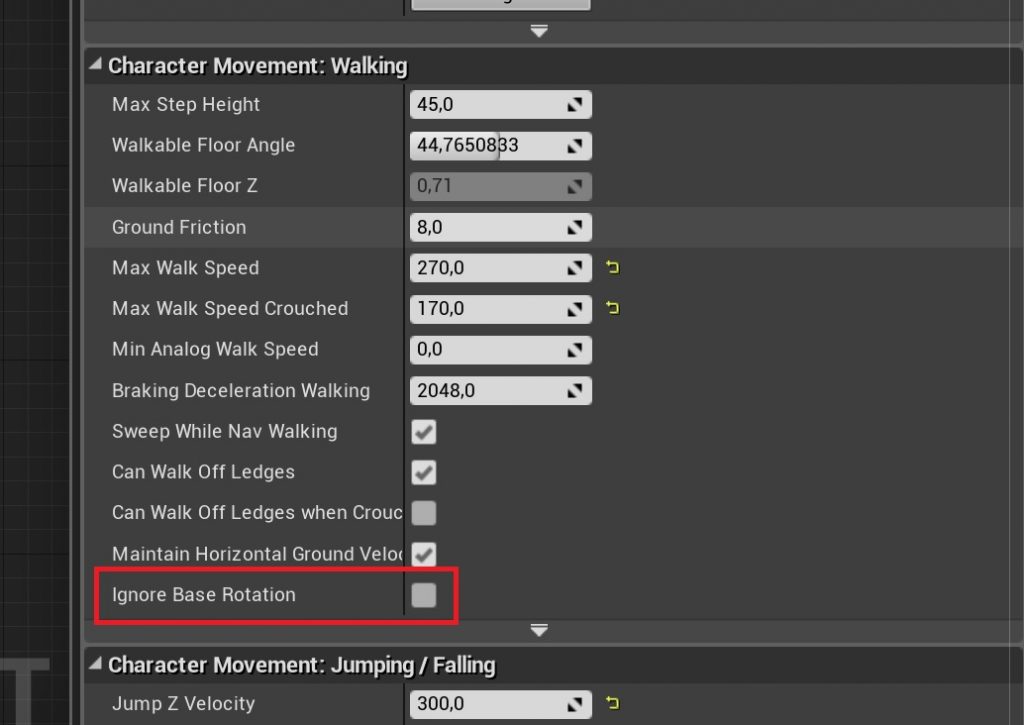
Now let’s create a walking animation. The Animation Starter Pack has a few sequences where a character slowly walks but there he aims with an iron sight. I want him to walk and hold his rifle on the hip. First of all, we clear the Locomotion State Machine from needless states. We’ll keep only idle and jog. And then we’ll add a walk state. Also, change the jog state according to the screenshot below. It needs to be done so we blend our animation sequences with the aim offset we made rather than with other sequences used in BS_JOG

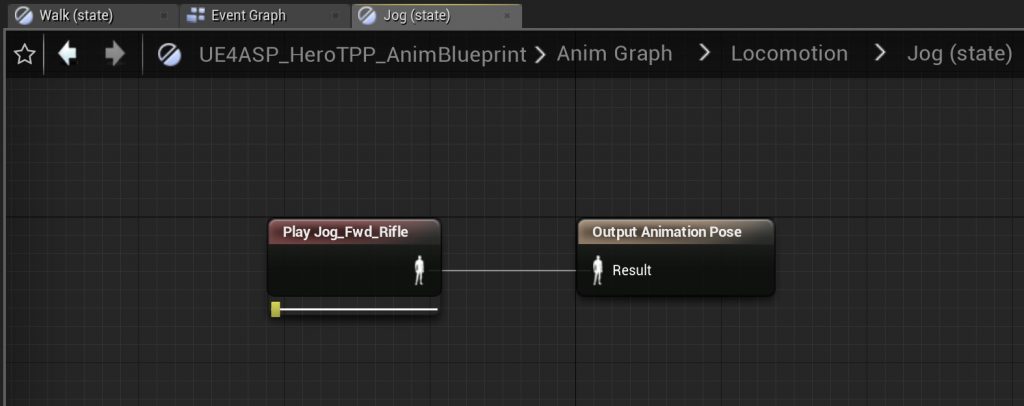

I also changed the transition between states: switch to walk from idle if the speed is greater than 1 and from walk to jog if the speed is greater than 300.
Now save and compile everything and hit play. When the character is idle and a player is moving the mouse, the character points his rifle around. So far, he aims with an iron sight. We have not activated the jog state yet. Let’s finish the walking animation first.
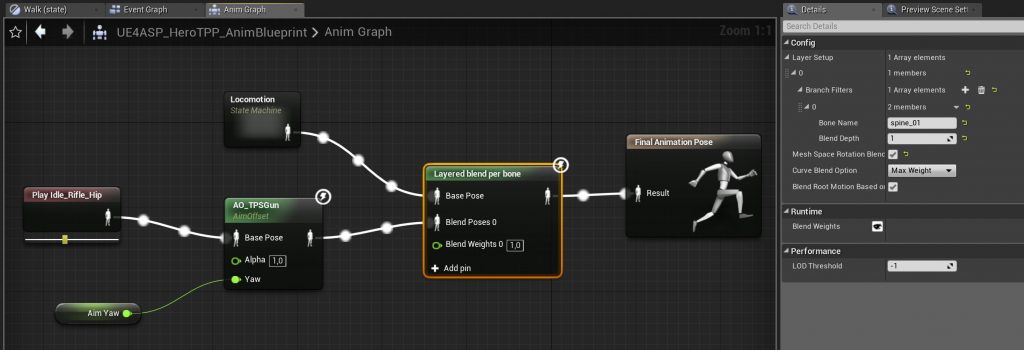
It would be good to make the character walk forward but holding his gun on the hip. Good thing, Unreal Engine allows doing that by blending animation together. Use Layered blend per bone node for that. Configure the node according to the screenshot:
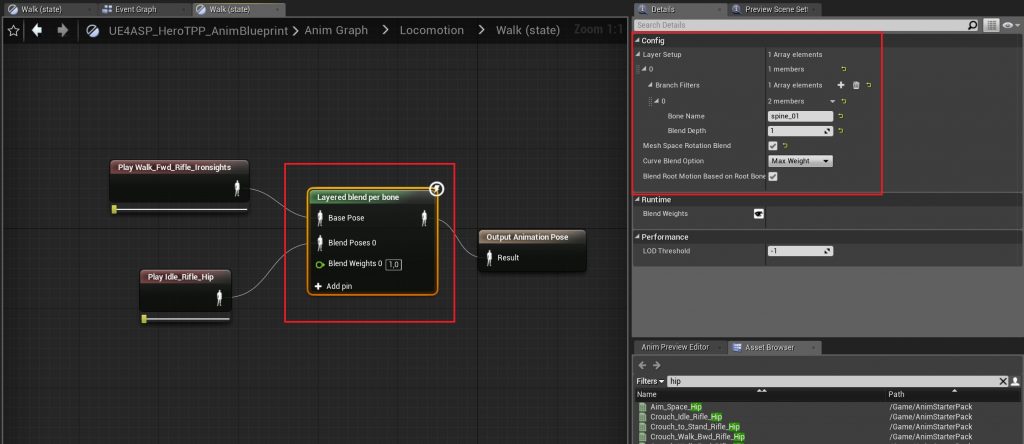
Hit play. The character walks and holds the gun on the hip. Good! Let’s enable jogging.
Jogging
By default the character from the Pack starts jogging when we press “W”, but since we mapped this button to simple walking, we’ll add an alternative mapping for jogging. Let it be something like Left Shift + W. Sounds good to me. I don’t play First Person Shooters too often but I know some of them have exactly this mapping to sprinting action.
Open the character blueprint and add the following to the Event Graph:
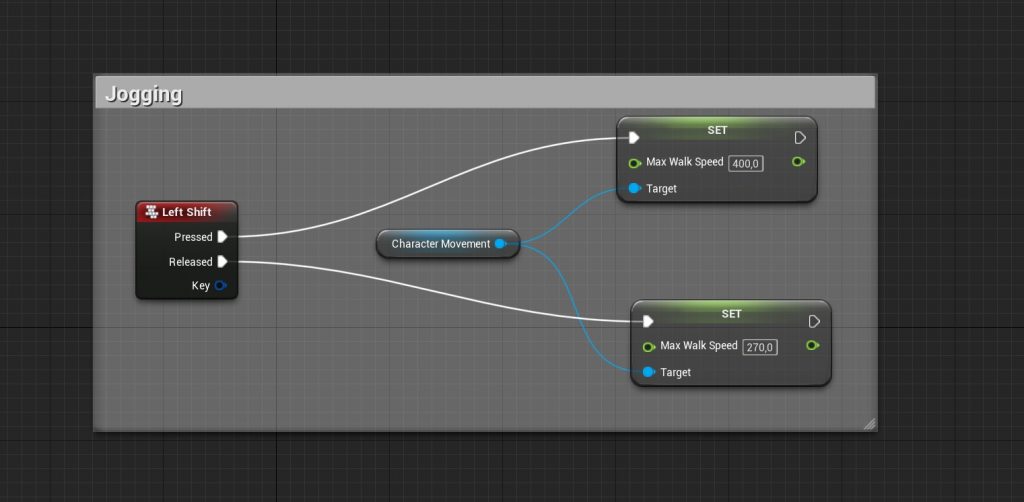
Once the player presses Left Shift we just set a new max speed for the character movement component. Once they release the button, we return the max speed to 270 (Remember, in the locomotion blueprint we change the state when the character speed is greater than 270). Easy-peasy!
Aiming all around
The last step is to enable all around aiming not only when we stand still but also when we walk or jog. You will need to adjust the animation graph a little for that:
You also need to change a few things in the Character Event Graph:
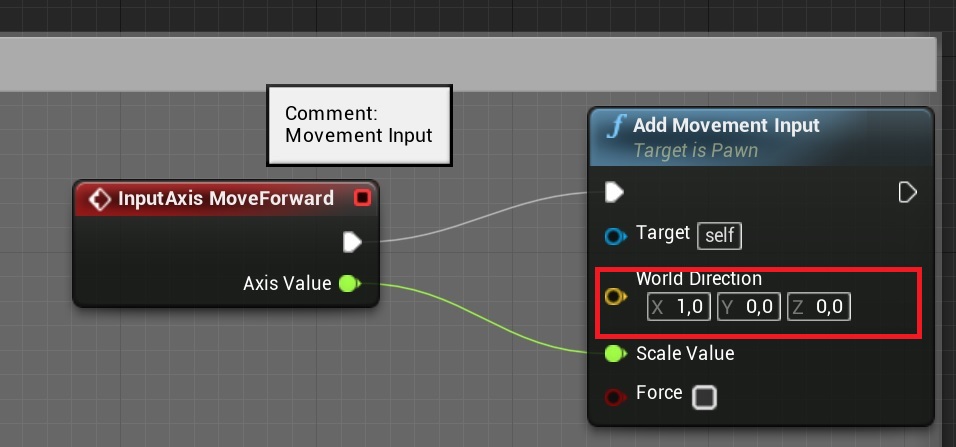
Yes, now we are able to move forward only. The mouse controls only the aiming component. You need to think up a way how to make the character turn left or right. In my game I use arrow buttons.
As a summary, I might say that you won’t probably use the Animation Starter Pack in your finished game but for prototyping it’s pretty good. It lacks many animations but it is not really hard to produce new ones just by blending existing.