Recently for my work, I had to build a custom mesh using ProceduralMeshComponent in UE4. The last time I worked with it a long time ago, so I decided to google some tutorials. To my surprise, there weren’t many: no documentation from Epics and an old tutorial from UE4 wiki: https://ue4community.wiki/legacy/procedural-mesh-generation-qb3m6ayk. It has a quite complicated solution involving the use of an unnecessary CreateSceneProxy method. I needed to create a simple plane, so the solution from the tutorial seemed to be overkill for me. I went a fairly easy way where I create a mesh in a single method in one go. If you just want to quickly find out how to build procedural mesh, this article may be useful for you.
For starters, create an empty C++ UE4 project. From there create a C++ class called AProcMesh which extends AActor. Define necessary fields:
#pragma once

#include "CoreMinimal.h"
#include "GameFramework/Actor.h"
#include "ProceduralMeshComponent.h"
#include "ProcMesh.generated.h"

UCLASS()
class PROCEDURALMESH_API AProcMesh : public AActor
{
	GENERATED_BODY()

	TArray<FVector> Vertices;
	TArray<int32> Triangles;
	TArray<FVector2D> UVs;

	UPROPERTY()
	UProceduralMeshComponent* ProcMesh;

	void CreateMesh();
public:

	// Sets default values for this actor's properties
	AProcMesh();
protected:
	UPROPERTY(EditAnywhere)
	UMaterialInterface* Material;

	// Called when the game starts or when spawned
	virtual void BeginPlay() override;
Vertices, Triangles and UVs are the fields where we are going to store information about procedural mesh data. ProcMesh is the ProceduralMeshComponent used for creating procedural meshes. And the final thing needed is a Material reference. We want to apply some texture to our mesh, right?
Then comes the implementation:
#include "ProcMesh.h"

AProcMesh::AProcMesh()
{
 	ProcMesh = CreateDefaultSubobject<UProceduralMeshComponent>("ProcMesh");
	RootComponent = ProcMesh;
}

void AProcMesh::CreateMesh()
{
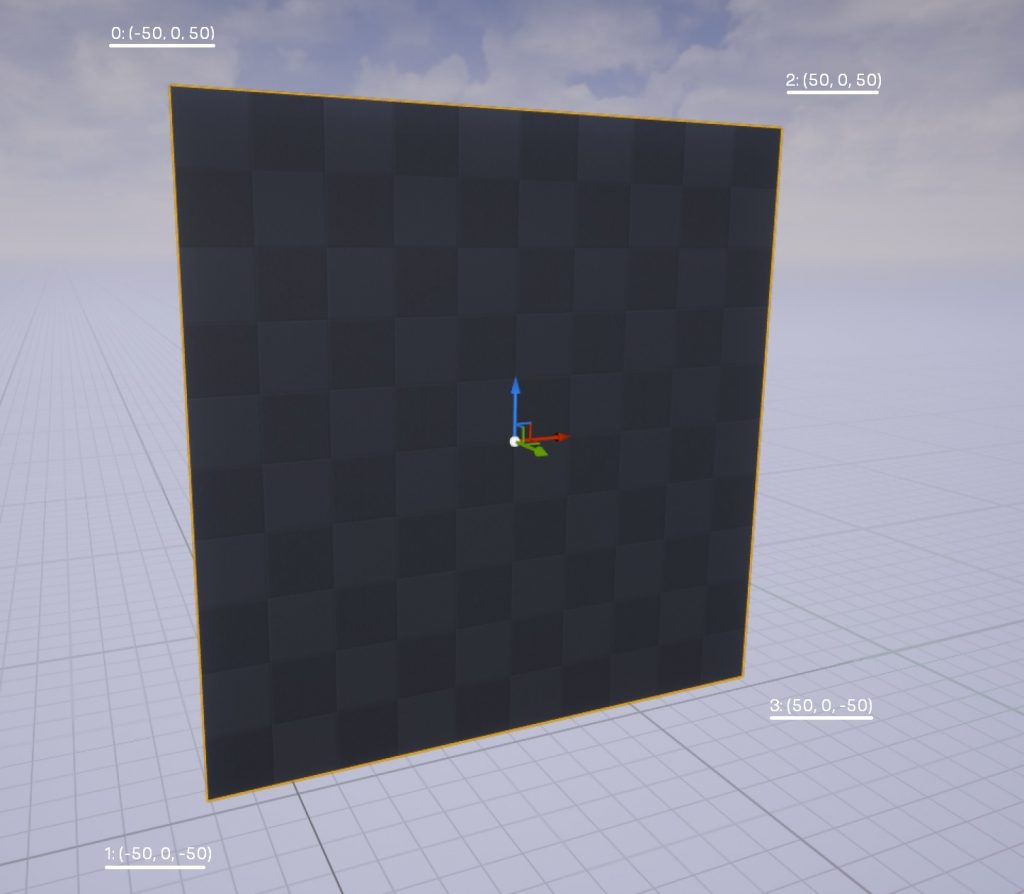
	Vertices.Add(FVector(-50, 0, 50));
	Vertices.Add(FVector(-50, 0, -50));
	Vertices.Add(FVector(50, 0, 50));
	Vertices.Add(FVector(50, 0, -50));

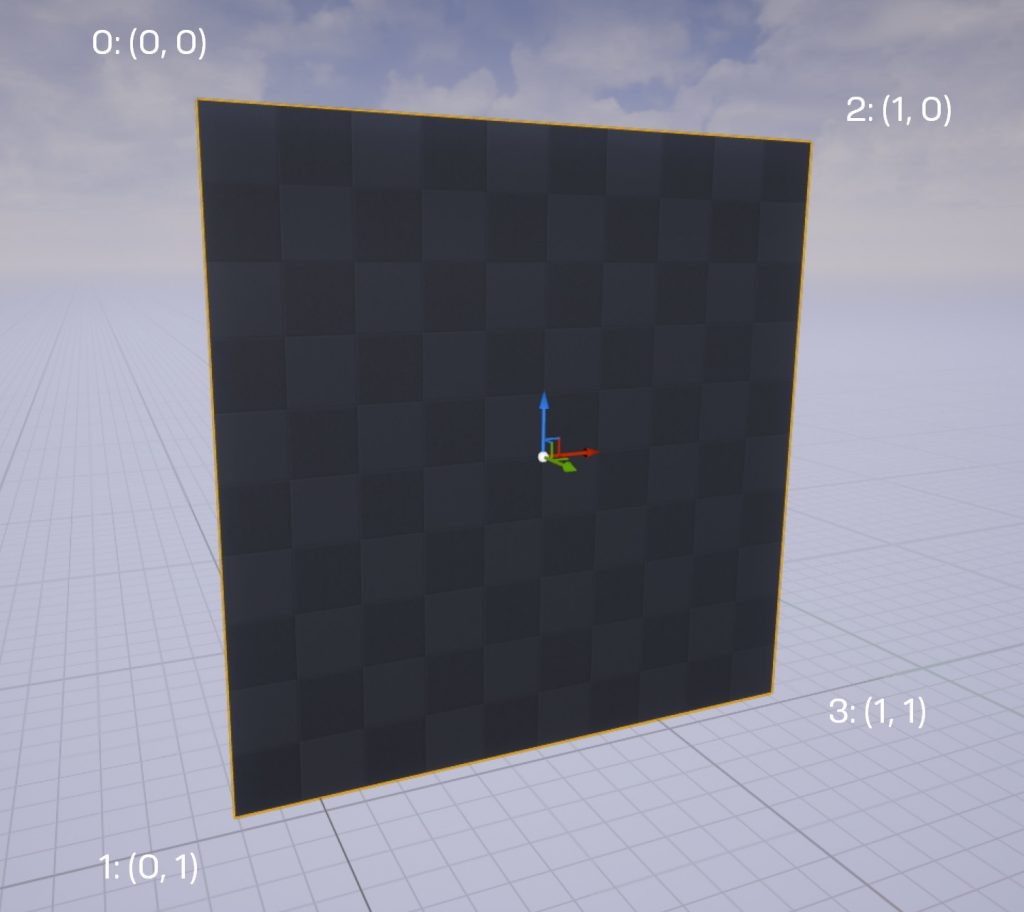
	UVs.Add(FVector2D(0, 0));
	UVs.Add(FVector2D(0, 1));
	UVs.Add(FVector2D(1, 0));
	UVs.Add(FVector2D(1, 1));

	//Triangle1
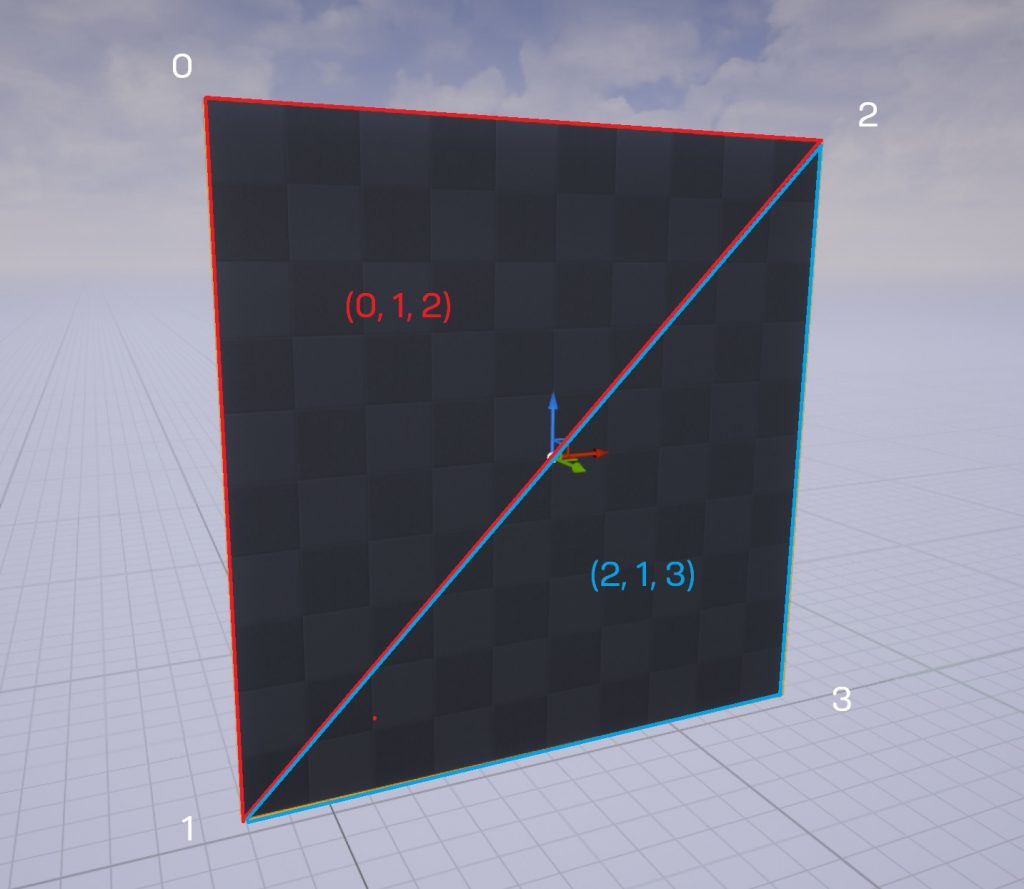
	Triangles.Add(0);
	Triangles.Add(1);
	Triangles.Add(2);

	//Triangle2
	Triangles.Add(2);
	Triangles.Add(1);
	Triangles.Add(3);

	ProcMesh->CreateMeshSection(0, Vertices, Triangles, TArray<FVector>(), UVs, TArray<FColor>(), TArray<FProcMeshTangent>(), true);
	if (Material)
	{
		ProcMesh->SetMaterial(0, Material);
	}
}

// Called when the game starts or when spawned
void AProcMesh::BeginPlay()
{
	Super::BeginPlay();

	CreateMesh();
}
This creates a simple square plane:

Let’s see how it is created. A mesh consists of vertices and faces. Vertices array here holds all the vertices for the plane:

The faces are represented by Triangles array:

The last bit is UV map information. It is required in order to correctly apply a texture:

Now we can apply a texture to our mesh:
That’s it! Now you can make something more sophisticated: https://80.lv/articles/building-procedural-art-tools-in-unreal-engine-4/ 😉


This was very helpful, thank you.
Yes, I was looking for the minimal set up to create a procedural mesh. This was very helpful.